In this story (15)
- 01Before you start: the one rule that saves beginners the most money
- 02Step 1: Read the empty room before you buy anything
- 03Step 2: Choose how the room should feel, then pick a palette
- 04Step 3: Find the focal point
- 05Step 4: Place the big furniture first
- 06Step 5: Ground everything with the right rug
- 07Step 6: Dress the windows (higher and wider than you think)
- 08Step 7: Light the room in layers
- 09Step 8: Hang art at the right height and size
- 10Step 9: Add softness with pillows, throws and texture
- 11Step 10: Bring the room to life with plants
- 12Step 11: Add side tables and hidden storage
- 13Step 12: Style the surfaces
- 14Step 13: Edit, then check it like a designer
- 15How to buy it all without overspending: shop in three phases
You have the keys, the walls are bare, the floor echoes when you walk across it, and you have no idea where to start. Do you buy the sofa first? Paint? Pick a rug? Most people in this spot do one of two things: they freeze and leave the room empty for months, or they panic-buy a few pieces they like one at a time and end up with a room that never quite comes together.
How to decorate an empty room: read the room first (light, walkways, measurements), choose a feeling and a 60-30-10 palette, find the focal point, then buy from biggest to smallest: sofa, rug, coffee table and curtains, then lighting and art, then pillows, plants and styling. Decorating isn't a talent. It's a short list of rules in the right order.
This guide walks you through those steps from the very beginning, using one real example. The two images below show the same room: first completely empty, then finished. Every decision between the two was made with a simple rule you can learn in a few minutes. We will go through them one at a time, explain the why behind each one, and show you the exact type of piece that was used, so you can copy the whole look or just borrow the method.
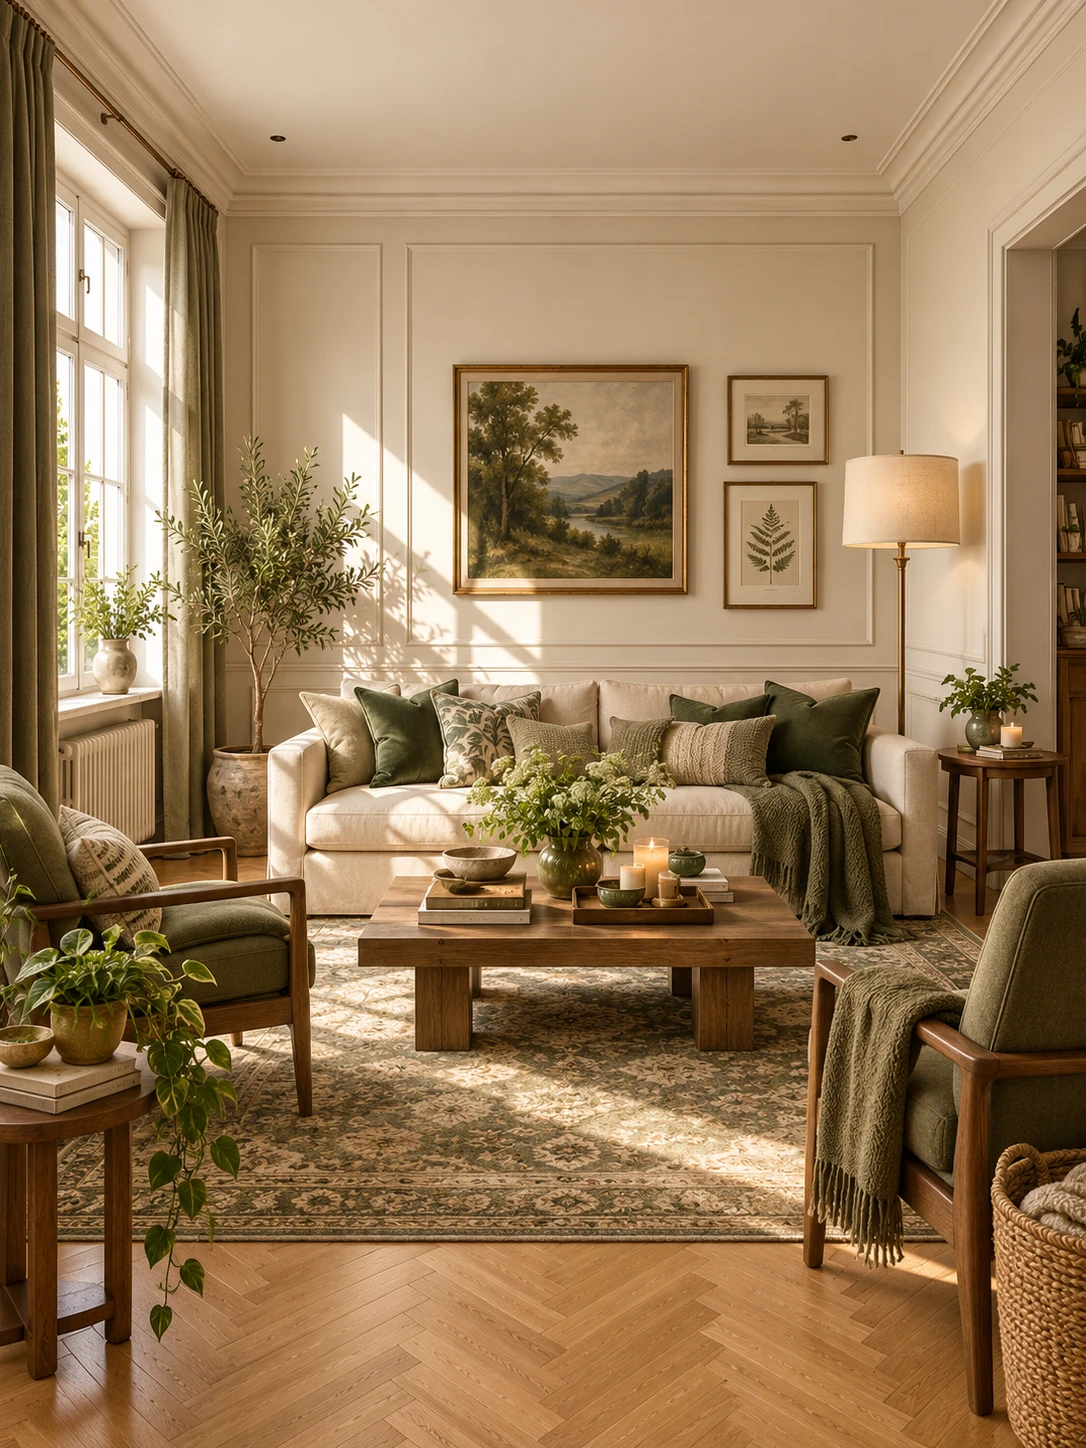
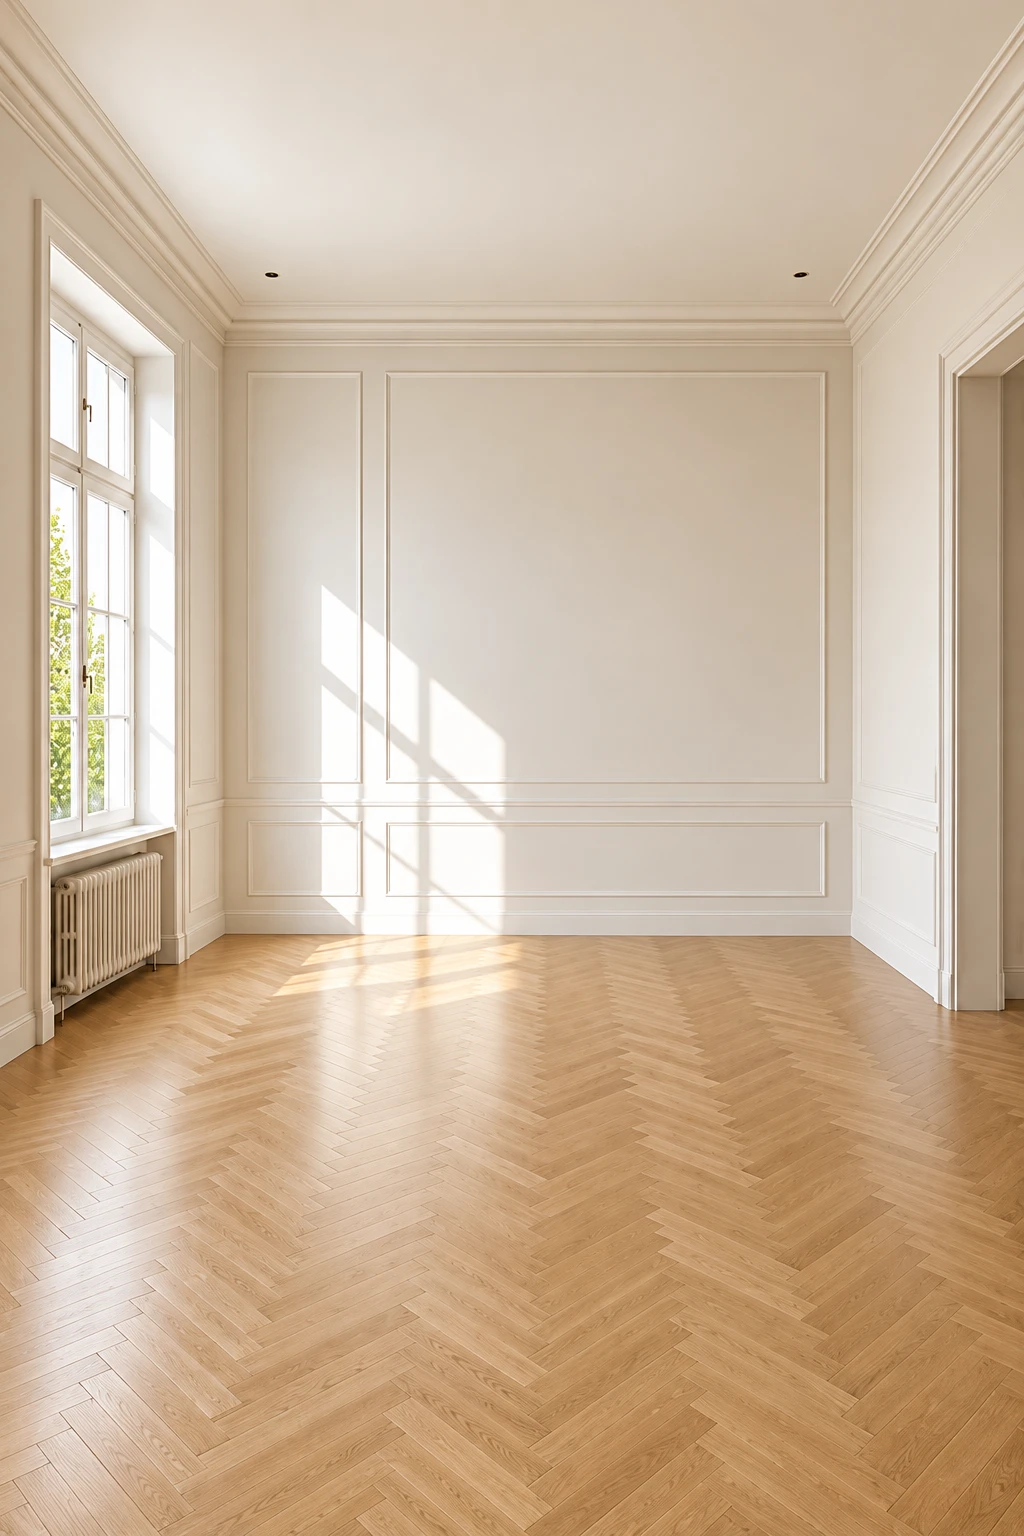 BeforeAfter
What you will learn
How to read an empty room before you buy anything, choose a color palette with the 60-30-10 rule, find a focal point, place furniture with real measurements, size a rug, hang curtains and art at the right height, layer lighting, mix pillows and textures, add plants, style a coffee table, and edit the room so it feels finished, not cluttered.
Time to read: about 20 minutes. Tools you need: a tape measure, painter's tape and your phone camera.
Before you start: the one rule that saves beginners the most money
Decorate from the biggest to the smallest, and from the floor up. The big pieces (sofa, rug, coffee table, curtains) decide the layout, the scale and most of the color in a room. Pillows, candles and vases come last, because they are there to tie the big pieces together.
Most beginners do the opposite. Small things are cheap and fun, so they buy cushions and frames first, then try to find a sofa that matches the cushions. That is how you end up with a room full of nice objects that do not belong together. Follow the order in this guide and every purchase has a job before you make it.
Step 1: Read the empty room before you buy anything
An empty room is the best moment you will ever have to understand a space. Nothing is hiding the floor, the light or the walls. Spend 20 minutes looking before you spend anything. Write down four things.
1. Where the light comes from
Stand in the room at different times of day. Where is the window, and when does the sun come in? In our example, one tall window on the left fills the room with warm afternoon light that lands on the back wall. That told us two things: the back wall would be the brightest, most visible surface (a good place for art), and the corner next to the window could host a tall plant that enjoys the light.
2. What the room already gives you
Look at the architecture you get for free. Our room has picture-frame molding on the walls, a crown molding, a light oak herringbone floor, a radiator under the window and a wide doorway on the right. These features are not obstacles. They are your starting palette. The floor is a warm wood, the walls are a warm cream, and the molding has a classic, traditional feel. Instead of fighting that, the finished room leans into it: classic shapes, warm wood, soft cream.
3. How people move through it
Walk from the doorway to the window and to any other door. These paths need to stay clear. A comfortable walkway is about 30 to 36 inches wide (76 to 91 cm). In our room the main path runs from the doorway on the right along the front of the room, so the seating sits in the middle and leaves that route open.
4. The measurements
Measure the length and width of the room, the window (width, height, and the distance from the top of the frame to the ceiling), the wall you plan to put the sofa against, and anything you cannot move, like the radiator. Draw a rough plan on paper with these numbers. It does not need to be pretty. You will use it in every step that follows.
Beginner shortcut: tape it out
Before buying furniture, mark its footprint on the floor with painter's tape: a rectangle for the sofa, one for the coffee table, squares for the chairs. Walk around them for a day. You will feel instantly if something is too big or if a path is blocked. It costs almost nothing and prevents the most expensive mistake in decorating: a sofa that does not fit.
Prefer to do it on screen? Our free room planner lets you drop furniture into a plan with your own measurements.
Step 2: Choose how the room should feel, then pick a palette
Before colors, pick three words for how you want the room to feel. For this room we chose: warm, calm, and collected (as in, it looks like it was gathered over time, not bought in one afternoon). Every later choice gets checked against those three words. A glossy chrome lamp? Not warm. A neon print? Not calm. It sounds simple, but it stops you from buying things you like that do not belong in this room.
Not sure what you like yet? Save 20 photos of rooms you love, then look for what repeats: colors, materials, shapes. Or take our style quiz, which does the same thing in a couple of minutes.
The 60-30-10 rule
This is the easiest color rule in decorating, and it works in any style. Split the room's colors into three amounts:
- 60% main color: the big surfaces. Walls, the largest piece of furniture, often the rug or curtains.
- 30% secondary color: the supporting pieces. Wood furniture, accent chairs, the floor.
- 10% accent color: the small, repeated touches. Pillows, throws, plants, frames, a lamp.
In our example the split is easy to see:
- 60% cream and warm white: the walls, the molding, the ceiling and the big linen sofa.
- 30% warm wood: the herringbone floor, the coffee table, the side tables and the wooden arms of the chairs.
- 10% olive and sage green, plus brass: pillows, curtains, the knit throw, the chair cushions, the plants and the brass floor lamp.
Notice that the green appears in many small places across the whole room, not in one big block. That repetition is what makes a room look planned. Your eye jumps from the pillows to the chair to the curtains to the plants, and it reads as one idea. A useful habit: every accent color should appear at least three times, in different parts of the room.
A last note on neutrals: cream, wood and green all sit on the warm side, which is why the room feels so soft. If your room has cool, gray light (a north-facing window, for example), the same palette still works, but choose slightly warmer creams so the walls do not look dull.
Step 3: Find the focal point
A focal point is the first thing your eye lands on when you walk in. Every room needs one, because without it the eye keeps searching and the space feels restless. It can be a fireplace, a big window with a view, a TV wall or a piece of art.
In our empty room the obvious candidate was the long back wall facing the doorway. It is the largest wall, it gets the most light and it has that big framed molding panel, which is basically an empty picture frame asking to be filled. So the plan was: sofa against that wall, art above the sofa, everything else arranged to face it.
To find yours, stand in the doorway and ask: what do I see first, and what do I want to see first? If the answer is a blank wall, that is fine. You will create the focal point with the sofa and art in the next steps.
Step 4: Place the big furniture first
With a focal point and a floor plan, the big pieces almost place themselves. The goal is a conversation area: seats that face each other close enough to talk without raising your voice, roughly 8 to 10 feet (2.5 to 3 m) across at most.
The sofa
The sofa is the largest and most expensive piece, and it usually sets the main color. A light neutral like cream linen is the most flexible choice for a beginner: it works with almost any accent color, so you can change the whole mood later just by swapping pillows and throws. As a size guide, the sofa should take up roughly two-thirds of the wall it sits on. Too small and it floats; too big and the room feels cramped.

Cream Deep-Seat Three-Seater Sofa
A soft cream sofa that becomes the calm, neutral base of the whole room.
Affiliate link · we may earn a commission
The accent chairs
Two matching armchairs facing each other, slightly angled toward the sofa, create a classic, balanced layout. In our room they sit at the front of the rug, one on each side, so the seating forms a U around the coffee table. Choosing chairs in the accent color (olive green) is a smart move: they bring the 10% color down to the lower part of the room, and their wooden arms repeat the 30% wood.
Leave space behind the chairs if they are on a walkway. And do not push all your furniture against the walls, which is the most common beginner habit. Pulling seats in toward the center makes a room feel more inviting, even a small one.

Olive Green Accent Chair with Wood Arms
An olive armchair whose wooden arms tie the accent color to the room's wood.
Affiliate link · we may earn a commission
The coffee table
Three numbers to remember:
- Length: about two-thirds of the sofa's length.
- Distance from the sofa: 14 to 18 inches (35 to 45 cm). Close enough to put down a cup, far enough for your knees.
- Height: the same as the sofa seat or 1 to 2 inches lower.
A solid, chunky wood table, like the one in our example, does two jobs: it anchors the middle of the room visually, and it brings in the warm wood tone right at the center of everything. A light, airy table works too, but in a room this soft, a heavier piece keeps it from feeling too delicate.

Chunky Solid Wood Coffee Table
A solid wood coffee table with real weight, right at the center of the room.
Affiliate link · we may earn a commission
Step 5: Ground everything with the right rug
A rug is what turns a group of furniture into a room. It defines the seating area and pulls the pieces together. The single most common decorating mistake is a rug that is too small: a little rectangle floating under the coffee table makes the whole room look cheaper and smaller.
The rule: at least the front legs of every seat should sit on the rug. In a typical living room that means 8 x 10 feet (240 x 300 cm), not 5 x 7. Leave a border of bare floor around the rug, about 12 to 18 inches (30 to 45 cm) from the walls, so the floor still shows.
Our rug also does a second job. Its vintage pattern mixes cream, olive and sage, so it contains every color in the room. When a rug carries your whole palette, everything you put on top of it automatically belongs. If you are nervous about pattern, this is the safest place to try it: a busy rug under plain furniture almost always works.

Vintage Olive Green Washable Rug (8 x 10)
A faded vintage-style rug that carries olive, sage and cream through the room.
Affiliate link · we may earn a commission
Step 6: Dress the windows (higher and wider than you think)
Curtains are the step beginners most often skip, and they make an empty room look finished faster than anything else. They soften the hard window frame, add height and bring in color. In our room, the sage linen curtains frame the window and carry the green up to the ceiling.
How to hang them so they look expensive:
- Hang high. Put the rod at least 4 to 6 inches (10 to 15 cm) above the window frame, or halfway between the frame and the ceiling. Close to the ceiling is even better in a room with tall windows. It makes the ceiling look higher.
- Hang wide. Extend the rod 8 to 12 inches (20 to 30 cm) past the frame on each side, so open curtains sit on the wall, not over the glass. The window looks bigger and you keep all the light.
- Get the length right. Curtains should just touch the floor or stop half an inch above it. Too short looks like the curtains shrank.
- Get the fullness right. The total width of your panels should be about 1.5 to 2 times the window width, so they fall in soft folds even when closed.
Linen or a linen-look fabric gives that relaxed, slightly textured drape you see in the photo. Pinch pleat tops hang in neat, even folds; if you are renting or on a budget, rod-pocket or back-tab panels are easier to find and still look good when hung high and wide.

Sage Green Linen Pinch Pleat Curtains
Soft sage linen curtains that frame the window and carry the green upward.
Affiliate link · we may earn a commission
Step 7: Light the room in layers
An empty room usually has one ceiling light, and one ceiling light makes any room flat. Designers light a room in three layers:
- Ambient: general light that fills the room. Daylight in the day, ceiling lights at night.
- Task: light where you do something, like reading. A floor lamp next to the sofa or a reading chair.
- Accent: small, low, warm pools of light that create mood. Table lamps, candles, a light on a shelf.
Look at the finished room: the window gives ambient light, a brass floor lamp with a linen shade stands at the end of the sofa for reading, and a small candle glows on the side table and coffee table. Light at different heights is what makes a room feel cozy in the evening.
Two simple rules: use warm bulbs (2700K) in every lamp so the color of the light matches, and aim for at least three light sources in a living room, spread out so no corner stays dark. Brass is a great finish here because it reflects warm light and repeats the gold of the picture frames.

Antique Brass Floor Lamp with Linen Shade
A brass reading lamp that adds warm light at the end of the sofa.
Affiliate link · we may earn a commission
Step 8: Hang art at the right height and size
Art is where many first-time decorators lose confidence, because it feels personal and permanent. It is neither. A few rules make it easy:
- Eye level: the center of a piece (or a group) should sit about 57 to 60 inches (145 to 152 cm) from the floor. This is the standard galleries use.
- Above a sofa: leave 8 to 10 inches (20 to 25 cm) between the top of the sofa back and the bottom of the frame, so the art and the sofa read as one unit.
- Size: the art (or the whole group) should be about two-thirds the width of the sofa below it. One small frame over a big sofa looks lost.
- Spacing in a group: keep 2 to 3 inches (5 to 8 cm) between frames.
Our room uses an easy grouping for beginners: one large landscape painting plus two small botanical prints stacked beside it. The big piece is the star; the small ones balance it. Everything shares the same palette (greens, cream, soft gold), which keeps the arrangement calm. Vintage-style landscapes are a beginner-friendly choice because they work in almost any warm, traditional or collected room.
Before you put a single nail in the wall, cut paper templates the size of each frame, tape them up and live with them for a day. Move them until it looks right, then hang the real thing.
The art wall
A vintage-style landscape as the main piece, with smaller botanical prints stacked beside it.
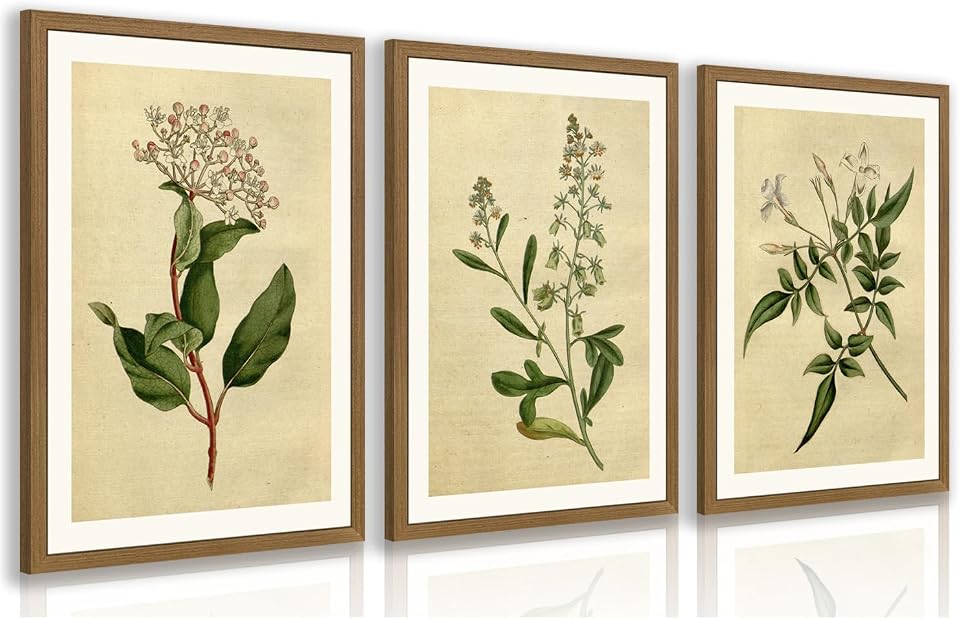
Vintage Botanical Prints in Wood Frames (Set of 3)
Herbarium-style botanical prints that balance a large painting.
Affiliate link · we may earn a commission

Vintage River Landscape Print in Gold Frame
A gold-framed vintage landscape that becomes the focal point above the sofa.
Affiliate link · we may earn a commission
Step 9: Add softness with pillows, throws and texture
Now that the room works, the soft layers make it feel like home. This is also where most of your accent color goes.
How to mix pillows without overthinking it
Use a simple formula: one solid, one pattern, one texture, and repeat it.
- Solid: olive green velvet. Velvet catches light, so a plain color still looks rich.
- Pattern: a botanical leaf print on cream. It links the sofa to the plants and the botanical prints on the wall.
- Texture: a cable knit or woven cover in cream or oatmeal, which adds coziness without adding more color.
On a large sofa, arrange them symmetrically from the outside in: the darker solids at the ends, then the patterns, then the textured ones toward the middle. If you mix patterns, vary the scale: one big pattern with one small one, never two of the same size. And pillows do not have to match the chairs; they only have to share the palette.
The throw
A chunky knit throw draped over the sofa arm (and another over a chair) is the easiest way to make a room look lived in. Do not fold it perfectly. Drape it so it looks like someone just got up. Ours is the same olive green as the velvet pillows, which repeats the accent color one more time.
The soft layers
Solid velvet, a botanical pattern and a chunky knit: the three textures that give the sofa depth.
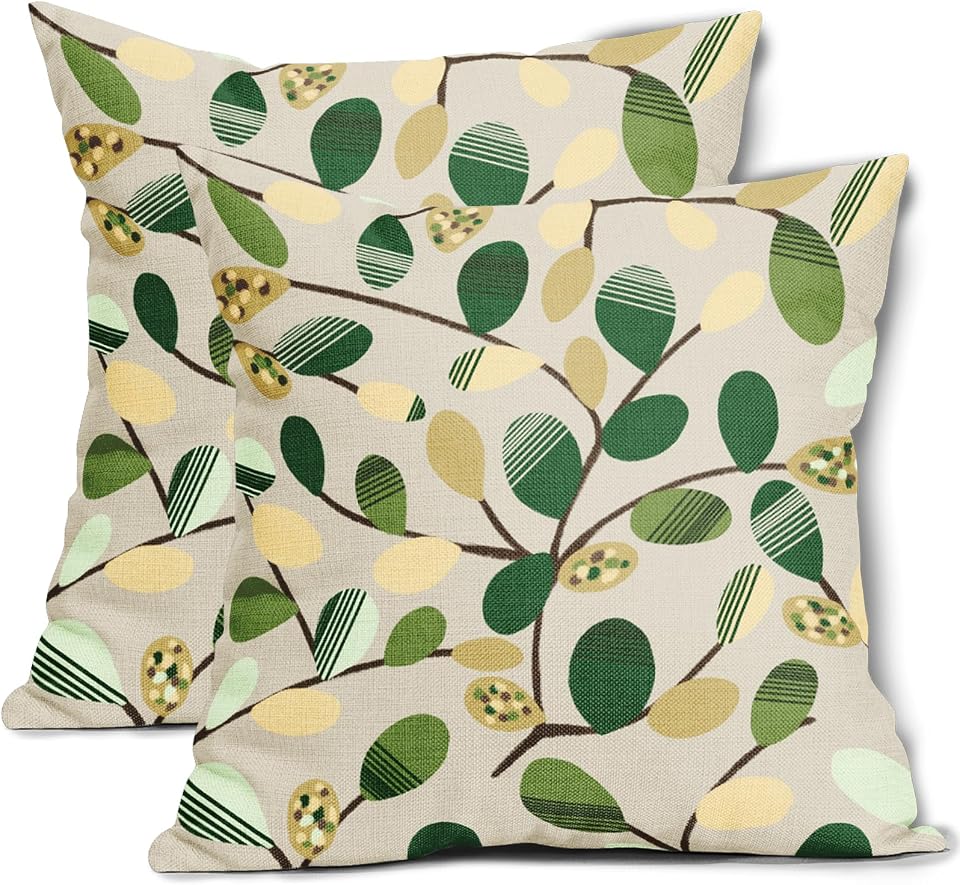
Green and Cream Botanical Leaf Pillow Covers
A sage and cream leaf print that links the sofa to the plants and botanical art.
Affiliate link · we may earn a commission

Olive Green Knit Throw with Fringe
An olive knit throw that makes the sofa look lived in.
Affiliate link · we may earn a commission

Olive Green Velvet Pillow Covers (Set of 2)
Olive velvet that catches the light and brings the accent color onto the sofa.
Affiliate link · we may earn a commission
Step 10: Bring the room to life with plants
Plants are the cheapest way to make a room feel finished, and they're in almost every room people save on Pinterest. They add a living shape, color and height that furniture can't.
Use three heights, the same way you did with light:
- Tall (floor): a 5 to 7 foot tree in an empty corner. In our room an olive tree in a big stone-look pot fills the corner by the window, softens the hard edge of the wall and makes the ceiling feel higher.
- Medium (table): a vase of fresh or faux greenery on the coffee table, at the center of the room.
- Low or trailing: a pothos spilling over the edge of a side table, which softens the lower, hard lines of furniture.
Real or faux? If you have bright light and like caring for plants, real is lovely (pothos is one of the easiest houseplants there is). Real olive trees need a lot of direct sun and often struggle indoors, so a good faux tree is the practical choice for most homes. Mix freely: a faux tree next to real flowers looks completely natural.
Three heights of green
A tall tree for the corner, a vase for the table and a trailing plant for a low surface.
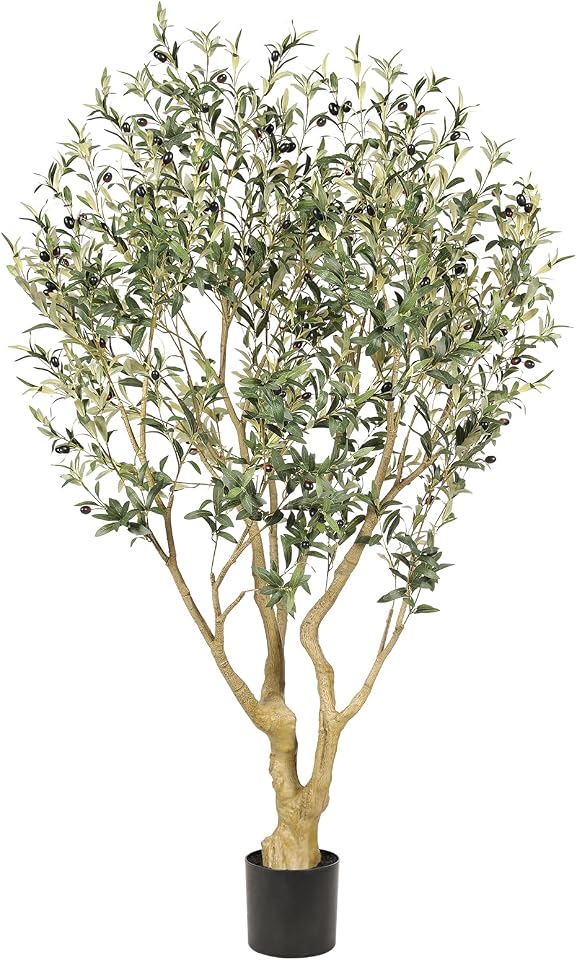
Faux Olive Tree (6 ft)
A tall olive tree that fills an empty corner and needs no care.
Affiliate link · we may earn a commission

Rustic Green Crackle Glaze Vase
A green crackle-glaze vase with a vintage, handmade look.
Affiliate link · we may earn a commission

Trailing Faux Pothos in a Ceramic Pot
Trailing vines that soften shelves and the edges of side tables.
Affiliate link · we may earn a commission
Step 11: Add side tables and hidden storage
A room is only comfortable if everyone has a place to put down a drink. The rule is simple: every seat should have a surface within arm's reach. In our room a round wood side table sits next to each armchair and one stands at the end of the sofa beside the lamp.
Round tables are a smart choice next to chairs: no sharp corners on a walkway, and the curve softens a room full of straight lines. Keep side tables about the height of the sofa or chair arm.
Then plan for clutter before it arrives. A large woven basket on the floor holds extra blankets and magazines, adds one more natural texture, and keeps the room tidy without a single piece of furniture.

Round Rustic Wood End Table
A round side table so every seat has a place for a cup or a lamp.
Affiliate link · we may earn a commission

Large Seagrass Blanket Basket
A handwoven seagrass basket that hides throws and adds natural texture.
Affiliate link · we may earn a commission
Step 12: Style the surfaces
Styling is arranging the small objects on tables and shelves. It is the last step, and the one where a little restraint goes a long way. Our coffee table follows a formula you can use on any table:
- Start with a tray. It groups small items into one tidy shape, so the table looks organized instead of cluttered.
- Add a stack of books. Two or three neutral, hardcover books give height and a flat base for a small object.
- Add something living. A vase with greenery or flowers.
- Add light. A couple of pillar candles, in a cream or ivory that matches the palette.
- Add one small object with an interesting shape, like a ceramic bowl.
Two helpful rules: group objects in odd numbers (three or five look more natural than two or four), and vary their heights so the eye moves up and down. Then leave some of the table empty. A coffee table still needs room for cups.
The coffee table set
A tray, candles, a vase and a book stack: the styling formula in four pieces.
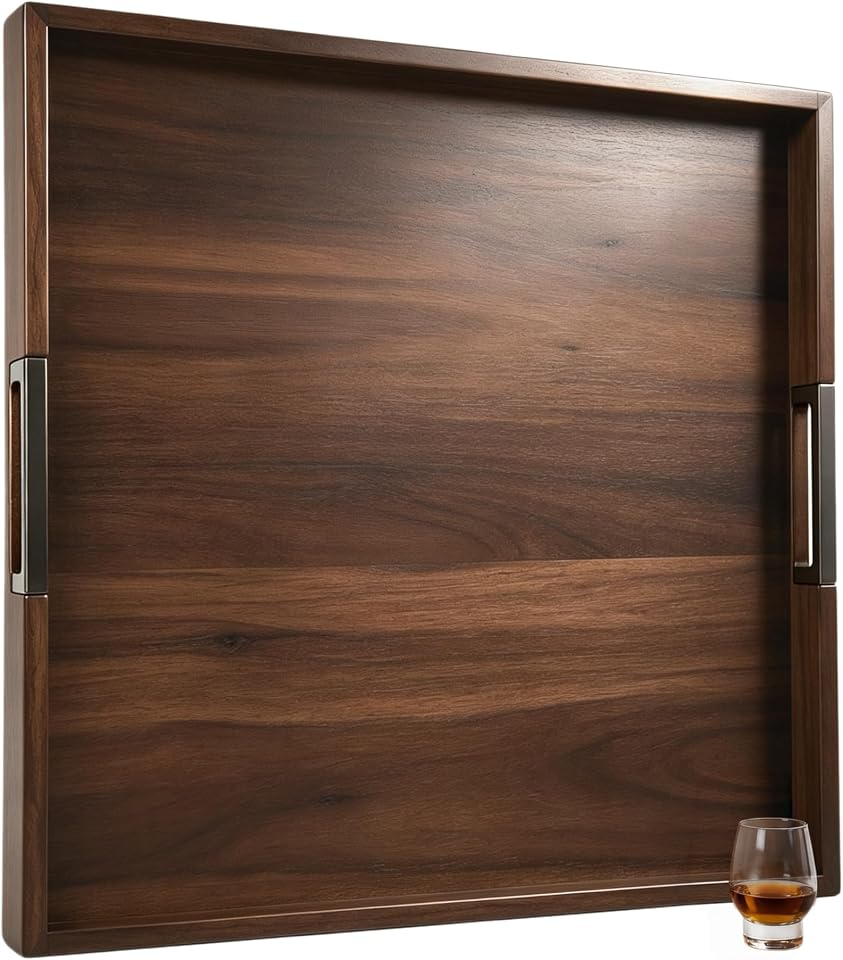
Acacia Wood Serving Tray with Handles
A warm wood tray that gathers small objects into one tidy shape.
Affiliate link · we may earn a commission

Decorative Coffee Table Books (Set of 3)
A ready-made book stack that adds height and a base for small objects.
Affiliate link · we may earn a commission

Ivory Unscented Pillar Candles (Set of 6)
Ivory pillars for a soft, low glow on trays and side tables.
Affiliate link · we may earn a commission
Rustic Green Crackle Glaze Vase
A green crackle-glaze vase with a vintage, handmade look.
Affiliate link · we may earn a commission
Step 13: Edit, then check it like a designer
When you think you're finished, take one thing away. Almost every first attempt has one pillow, one frame or one object too many. A room feels calm when the eye has places to rest.
Then run three quick checks:
- The doorway check: stand where you enter. Does your eye land on the focal point first? Is the path clear?
- The balance check: is the visual weight spread around? Our room balances the tall tree and curtains on the left with the lamp and bookshelf on the right, and the chairs mirror each other across the rug.
- The photo check: take a photo on your phone and turn it black and white. Without color, you instantly see if one side is too heavy, if a corner is empty or if the room has no contrast. Designers use this trick all the time.
How to buy it all without overspending: shop in three phases
You do not have to buy everything at once. In fact, you should not. Living in the room for a few weeks between phases teaches you what it actually needs.
- Phase 1, the foundation: sofa, rug, coffee table, curtains. After this the room is already usable and looks intentional.
- Phase 2, the structure: accent chairs, floor lamp, side tables, art. Now the layout and lighting are complete.
- Phase 3, the finishing: pillows, throw, plants, basket, tray, candles and books. These are the cheapest pieces and the easiest to change later.
Spend most of your budget on the pieces you touch every day and that are hard to replace (the sofa and the rug), and save on the things that are easy to swap (pillow covers, frames, accessories). Pillow covers in particular are a cheap way to change a room's look each season without touching the furniture.
Your first room doesn't have to be perfect. If something still feels off after step 13, it's almost always one of the problems in our living room decorating mistakes guide, and each one has a fix. Follow the order, check each step against your three words, and you'll end up with a room that looks designed, because it was.
Decorating an empty room: questions
Where do I start when decorating an empty room?
Start by studying the room: the light, the architecture, the walkways and the measurements. Then choose a feeling and a palette, find the focal point and buy the large pieces first (sofa, rug, coffee table, curtains). Accessories always come last.
What should I buy first for an empty living room?
The sofa, because it is the biggest piece and decides the layout and main color. Buy the rug right after, sized so the front legs of every seat sit on it. Curtains and a coffee table complete the foundation.
What is the 60-30-10 rule in decorating?
It is a color formula: about 60% of the room is a main color (walls and large furniture), 30% a secondary color (wood furniture, chairs, floor) and 10% an accent color repeated in small touches like pillows, throws and plants.
How do I make an empty room feel cozy?
Layer it: a rug to soften the floor, curtains to soften the windows, at least three warm light sources at different heights, a mix of textures like velvet, linen and knit, and plants. Pull furniture into a conversation area instead of lining the walls.
How high should I hang art above a sofa?
Leave 8 to 10 inches between the top of the sofa back and the bottom of the frame. On a bare wall, center the art at 57 to 60 inches from the floor. The art or group should be about two-thirds the width of the sofa.
How can I decorate an empty room on a budget?
Shop in phases: the foundation first (sofa, rug, coffee table, curtains), then chairs, lighting and art, then accessories. Spend on what you use every day and save on easy swaps like pillow covers, frames, plants and candles.
Your turn
Plan your room before you buy
Measure your room, then sketch the sofa, rug and chairs in our free room planner. Get the layout right first and every purchase after that gets easier.
Was this story helpful?
Written by
Hemza
Founder & Editor
Founder of decorwithstyle. I style warm, lived-in rooms with natural wood, soft textiles and budget-friendly finds, and share the exact pieces behind every look.
More from HemzaKeep exploring